Style
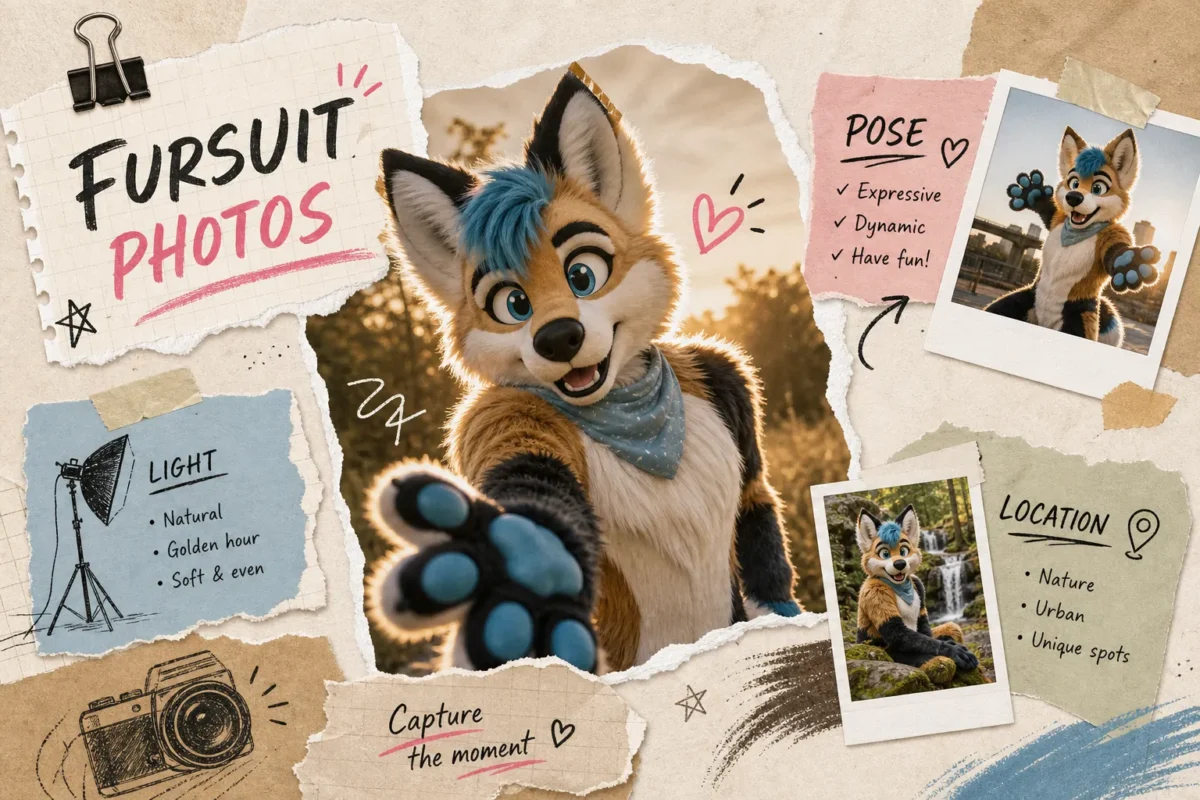
Fursuit Photography Tips: Lighting, Posing & Locations
Jun
Fursuit photography sits in a category all its own. It borrows from portrait work, action photography, and costume documentation, but the rules shift the moment your subject is wearing a full foam-and-fur head that doesn’t move. The camera doesn’t care how much craft went into the build. What it captures is light, shape, and timing. Getting those three things right is what separates a photo that stops a scroll from one that disappears into a convention gallery folder.
Some suits are built with that photographic reality in mind from the start. LED-lit Protogen builds, like the helmets crafted at Ruby Protogen Studios, carry a built-in visual language: glowing visors, sculpted bio-gear paneling, and angular silhouettes that read immediately on camera. These are suits designed with visual impact as a core feature, so the photographer’s job becomes composing and timing rather than fighting the subject. The suit does a lot of the heavy lifting.
Whether you’re behind the camera for the first time or suiting up for your first dedicated fursuit photoshoot, this guide covers the fundamentals: light, location, settings, posing, and how to find the right photographer for your build.
Fursuit Photography Lighting: Get the Look
Natural light is your most reliable friend
Soft, indirect natural light flatters fursuit textures and fur in a way that harsh direct sun simply cannot. Open shade, overcast skies, and north-facing walls (which stay out of direct sunlight in the Northern Hemisphere and act as a consistent source of diffused ambient light) all wrap around the suit’s features without creating unreadable shadows in eye sockets or blown highlights on fabric surfaces. The practical step is simple: find shade first, then position the suiter so they’re facing the open light source rather than a solid wall or tree trunk.
Direct midday sunlight creates two problems at once. It burns detail out of bright fur panels and plunges darker areas into near-black shadow, making the suit look flat and disconnected in the final image. Overcast days, which most photographers treat as a disappointment, are often ideal for fursuit photoshoot conditions because the cloud cover acts as a giant softbox across the entire sky.
Why catchlights change everything
Catchlights are non-negotiable in fursuit photography. In a human portrait, the face communicates emotion through expression, but a fursuit face is static. The eyes carry all the perceived life in the image, and without a visible catchlight, they read as flat and hollow. A well-placed reflection in a fursuit eye piece or LED visor makes the entire costume look animated and present, even in a still frame.
You don’t need complex equipment to achieve this. Positioning the suiter near a bright open sky, a large window, or a simple reflector bouncing light back toward their face will create that defining highlight. On LED-equipped helmets, the visor itself often generates its own catchlight effect naturally, which is one reason those builds tend to photograph so well without extra effort.
Golden hour and why it works for outdoor shoots
The warm, directional light of golden hour wraps around suit features in a way that midday sun cannot replicate. It softens shadows, adds texture along fur edges, and gives outdoor fursuit photos a cinematic quality without any additional gear. For suits where you want a stylized, warm look rather than strict color accuracy, golden hour is the obvious choice.
There’s a practical bonus here too: golden hour means cooler temperatures, which directly benefits the person inside the suit. A comfortable suiter moves with more energy and expression in every frame. Planning outdoor sessions to end at golden hour rather than starting at noon pays off on both sides of the camera. For concrete ideas on planning a session to take advantage of that light, see 4 golden hour portrait session tips.
Fursuit Photography Location Scouting
What to look for in an outdoor location
A strong outdoor fursuit photoshoot location gives you background separation, visual contrast that complements the suit’s color palette, enough open space for the suiter to move safely, and shaded areas nearby for cooling breaks. Urban environments offer geometric backdrops and architectural scale. Botanical gardens provide color and organic texture. Forested trails create a natural, immersive mood. The best choice depends on the character’s personality, so match the location aesthetic to the build before you commit to a spot.
Background clutter is the most common problem in outdoor fursuit photos. A parking lot, a busy street with signage, or a patchy grass field all compete visually with the suit. Aim for clean backgrounds with a single dominant color or texture, and use distance between the subject and the background to let the aperture do the separation work.
Convention floors and event spaces
Conventions like Anthrocon and Midwest FurFest are exciting environments for fursuit photography and genuinely challenging ones at the same time. Overhead fluorescent lighting mixed with window light, tight hallways, and constant foot traffic create obstacles that require quick problem-solving. The trick is knowing where the good light lives before the shoot starts.
Many conventions designate dedicated photoshoot rooms or atrium spaces specifically for furcon photography, and these are worth seeking out in advance. Quieter corners near large windows, hotel lobbies with high ceilings, and convention-center exteriors against clean architectural backdrops often produce the strongest results. Scouting the venue before your shoot session is one of the highest-return things you can do, even a quick walk-through the afternoon prior can reveal where light falls best and which hallways stay clear enough to work in.
Studio setups for controlled results
A studio session offers something outdoor locations can’t: complete control over every variable. Consistent light, no weather risk, and clean backgrounds let you focus entirely on posing and detail. Studio sessions typically run $200 to $350 per hour with 15 to 20 edited deliverables, a meaningful investment, but a reasonable one when you need fursuit portfolio-quality results. (Rates are based on community photographer listings and convention pricing surveys; individual rates will vary.)
For LED-equipped suits, a darker studio environment with controlled artificial lighting produces dramatic, cinematic results that natural light simply can’t replicate. When a Protogen helmet’s visor is glowing against a dark background, the suit becomes its own light source, and the photographer’s job shifts to working with that glow rather than fighting ambient exposure. It’s one of the most visually distinct setups in the whole genre of costume photography. For technical guidance on working in low-light studio environments, see Canon’s low-light photography tips.
Camera Settings for Fursuit Photography, Shutter, Aperture, ISO
Shutter speed and why it matters with moving subjects
Fursuit performers move constantly, head tilts, steps, turns, waves, and gestures, and even subtle motion blurs fast at slow shutter speeds. Use 1/250s as your reliable starting point for any active posing and treat 1/125s as the absolute slowest you’ll go with a still subject. This isn’t an advanced consideration; it’s a baseline that applies on every shoot regardless of your camera system. If faster shutter speeds force you into higher ISO values in low light, accept the added grain over motion blur, a sharp, slightly noisy frame is always more usable than a clean smear.
Aperture and lens choice
A wider aperture (f/2.8 to f/4) creates the background separation that isolates the suit from a busy environment and lets more light in for indoor or shaded sessions. A 50mm prime or short telephoto is the go-to lens for fursuit portrait work because wide lenses distort suit proportions when used close up, which makes the helmet look misshapen in ways that don’t reflect the actual build. For full-suit shots where you need the entire costume sharp, stopping down to f/5.6 or f/8 gives you the depth of field to keep head-to-toe detail readable.
For LED-lit suits in low light or studio environments, open the aperture as wide as your lens allows and raise ISO as needed. A practical starting preset for a dark studio LED session is f/2.8, 1/125s, ISO 800 to 3200, with a custom white balance set from a gray card. Adjust ISO upward if the frame is still too dark; slow the shutter only if the suiter is completely still. For a concise checklist of useful camera settings to start from, refer to 5 camera settings every pet photographer needs to know, which translates well to costume work.
Focusing on the eyes, always
Regardless of your camera system, lock your autofocus point to the suit’s eyes or visor before every shoot. On LED-equipped helmets, the visor creates a high-contrast target that autofocus locks onto reliably, which actually makes these builds easier to photograph than some traditional fursuit heads with lower-contrast eye pieces. Before each new setup, take a moment to confirm focus is landing exactly where you want it, that one habit eliminates one of the most common reasons fursuiting photography misses its mark.
Posing techniques that bring performances to life
Use body language, not facial expression
Since the suit’s face doesn’t move, all emotional communication comes from the body. A slight head tilt reads as curiosity. A forward lean reads as engagement. Angled shoulders read as confidence. Standing straight on to camera reads as flat and stiff. Give the performer character prompts rather than rigid pose prescriptions so the body responds naturally, because a prompt like “your character just spotted something interesting across the room” produces a more believable read than “put your left arm here.” For a deeper dive on posing and the power of body language in portraiture, read this piece on posing and body language basics.
Directing motion for dynamic shots
Small, controlled movements create energy without making the suit unreadable in frame. A slow turn, a step forward, a wave, or a playful hop all give the photographer timing opportunities and give the image life. Burst mode helps here: letting the camera capture a short sequence means you can select the cleanest frame from several where the costume details stayed sharp and the motion hit its peak.
Safety and cooling breaks as part of the shoot plan
Heavy full suits overheat fast, especially under direct sun or studio lighting. Frame cooling breaks as a built-in part of the session, not an interruption, and keep water accessible throughout. Brief performers at the start that they can signal for a break at any time, and plan sessions in short segments with built-in rest between setups. A suiter who isn’t pushing through heat exhaustion moves with better energy and more natural body language, which means better fursuit photos for everyone. Check in often about breathing, visibility, and temperature, and stop immediately if the performer feels dizzy or overheated.
Capturing the character, not just the costume
How LED-equipped suits change the photographic equation
Not every suit photographs with the same ease. Strong value contrast between colors, clear face shape definition, and detail at the focal point all determine how much personality reads in a still image. Suits that rely heavily on texture in person can lose dimension when compressed into a flat image file, while suits with clear eye definition and bold silhouettes translate immediately.
LED Protogen helmets carry visual personality engineered directly into their structure. A glowing visor, bio-gear panel detail, and an angular silhouette create immediate visual interest that the photographer doesn’t have to manufacture. In a low-light environment, the suit’s own LEDs become a practical fill light source, solving some of the very lighting challenges covered earlier. To learn about LED options and installation considerations for these helmets, see LED Fursuit Eyes: Best Kits, Styles, and Install Tips, rubyprotogenstudios.store.
Examples of purpose-built partials and helmets that emphasize photographic presence can also be helpful when planning a session; one such example is the Fairy Dragon Fursuit Partial!
Matching your composition to the character’s story
Environmental storytelling is one of the most underused tools in fursuit photography. A nature-dwelling character belongs in a forest; a sci-fi build reads immediately against industrial architecture. A playful character framed in a wide open field projects a completely different energy than either. Ask the performer about their character’s personality and backstory before the shoot and use that context to inform your framing, angle, and location choice. A portrait that reflects the character’s identity will always outperform a technically perfect shot with no narrative behind it.
Finding a photographer, booking, and community etiquette
How to find and vet a fursuit photographer
Furtrack (furtrack.com) is the clearest dedicated community hub for discovery: it’s built specifically for fursuit photo tagging and community search, so you can find photographers whose work appears consistently across convention galleries and character portfolios. Instagram accounts like @shotfurshot offer style reference and show how a photographer handles experimental angles. Convention-organized photo galleries give you a realistic look at how someone performs under event conditions, which is different from a controlled outdoor session. When vetting, look for a fursuit portfolio that shows both full suits and helmet close-ups, since both require different skill sets and not every photographer handles both equally well. Strong fursuit commissions often come directly from a well-maintained portfolio that showcases range across build types.
Pricing benchmarks and what to expect
Outdoor session packages typically run $150 to $250 for one hour with 10 to 15 edited photos. Studio sessions run $200 to $350 with more controlled deliverables, usually 15 to 20 edited images. Convention rates are often hourly at $15 to $25 per hour and are frequently split between two suiters sharing the session. Most photographers are open to negotiation on special projects, off-season shoots, or experimental builds that give them fursuit portfolio material worth having.
Etiquette, permissions, and sharing your fursuit photos
Always ask before photographing a suiter at a convention; public appearance doesn’t imply automatic consent. Don’t photograph suiters with their heads off unless they explicitly welcome it, that’s a widely observed privacy norm in the fursuit community. Confirm with the suiter before posting or tagging images online, and credit both the suiter and the photographer in every post. For any commercial use, a written release is the professional standard even when the community often operates more casually.
For building a visible presence with your fursuit photos, Furtrack and Instagram together are the strongest combination. Furtrack handles searchable fandom discovery with consistent tagging by suit name, character, event, and species. Instagram handles reach and polished highlights. Use both, keep your tags clean and accurate, and link between them so the full archive is always findable.
Preparation is what makes a great shoot
Fursuit photography rewards preparation at every stage. Know your light before you arrive at the location. Scout the space before the suiter puts the suit on. Understand the build you’re photographing so you know what to work with rather than against. When the costume is designed with visual impact as a core feature, the photographer’s focus shifts entirely to composition and timing, the suit brings the story, and the camera just has to be ready for it. If you’re planning a commission or want to intentionally design a build with photographic priorities, see Customize your fursuit, rubyprotogenstudios.store for ideas on balancing form and function.
Whether you’re planning a first outdoor session at a local park or scouting convention spaces for a shoot day at FurFest, the fundamentals covered here give you a real, actionable starting point for fursuit photography that does justice to the craft that went into the costume. LED-lit Protogen builds are built to be photographed, the glow, the angular geometry, the bio-gear detail all give a photographer genuine material to work with from the first frame.